Installing Your Software
Software Requirements
The following software components are required to build and run your first solution using Cloud Connector for Java:
To install this software, follow the instructions in the Software Installation section.
Software Installation
In order to develop a Cloud Connector based application or solution, you need to install and configure several software pieces.
Cloud Connector for Java ME SDK
The first piece of software is the Cloud Connector for Java ME SDK. This package includes a collection of samples, solutions and libraries that will help you to develop Java applications using Cloud Connector. This file can be downloaded from here:
Download Cloud Connector for Java ME
To work with this package you have to unzip the file you just downloaded. The main directory (cc4j_me_sdk_1.0.0) has the following structure:
- /certificates: Contains the Digi public certificate.
- /configuration: Contains the template of the Cloud Connector configuration file. For further information on this file, read the Cloud Connector Configuration topic.
- /libraries: Contains the Cloud Connector libraries:
- CloudConnector_JavaME_to_customize/CloudConnector.jar: Cloud Connector library for Java ME which allows you to create a custom Cloud Connector for your platform. This library is the core on which the implementations for any platform are based.
- CloudConnector_JavaME_for_Emulator/CloudConnector.jar: Cloud Connector library for Java ME which allows the connection of your Java ME Emulator with Device Cloud. This library includes the code of the previous library and the custom implementation for Java ME Emulator platforms. The code of this last part is included in /samples/platform_customizations.
The javadoc is included in the file called CloudConnector-javadoc.zip located inside the CloudConnector_JavaME_for_Emulator folder.
- /samples:
- java_apps: Contains several sample applications using the Cloud Connector library.
- platform_customizations: Contains the Emulator customization source code of the Cloud Connector for Java ME.
- web_apps: Contains the source code of the Web Application used for the Tank Demo.
- License_Agreements.txt: Legal agreement between the end-user and Etherios for use of Etherios technology.
- Release_Notes.rtf: Latest release information of Cloud Connector for Java.
Java SE Development Kit
You must install a Java SE Development Kit (JDK) in order to compile Java projects. The recommended version is JDK 8. If you already have a JDK 1.7 or higher installed on your PC, you can skip this step.
You can download the JDK from here:
http://www.oracle.com/technetwork/java/javase/downloads/index.html
Once the download is complete, execute it and follow the on-screen instructions to finish the installation process.
Java ME SDK 8.0
Next you will need to install Java ME SDK 8.0. This software provides all the required libraries and binaries to compile Java ME applications and run them in your device. You can download it from:
http://www.oracle.com/technetwork/java/javame/javamobile/download/sdk/index.html
Once the download is complete, execute it and follow the on-screen instructions to finish the installation process.
NetBeans IDE
To be able to develop, compile, and run Java ME applications, you need an IDE capable of managing Java ME projects and performing various project operations. The recommended IDE to work with Java ME is NetBeans version 8.0 or later. You can download it from the following link:
https://netbeans.org/downloads/
Once the download is complete, execute the file and follow the on-screen instructions to complete the installation process.
Java ME SDK 8.0 Plugins for NetBeans
In order to use the Java ME SDK with NetBeans IDE, several plugins integrating Java ME functionality into the IDE are required. These required plugins are the Java ME SDK Tools plugins. To install them, follow these instructions:
- Go to http://www.oracle.com/technetwork/java/javame/javamobile/download/sdk/index.html and locate the section called ORACLE JAVA ME SDK 8 DOWNLOAD.
- Download Oracle Java ME SDK 8 Plugins for NetBeans 8 by clicking the link on the right (ensure you have already accepted the License Agreement on the top of the page).
- Once downloaded, uncompress the zip file to a directory (the zip file does not contain a directory, so ensure you create one for its contents). It contains several *.nbm files.
- Open the NetBeans IDE.
- Navigate to Tools > Plugins within the menu.
- Select the Downloaded tab and click on the Add Plugins... button in the top left corner of the dialog.
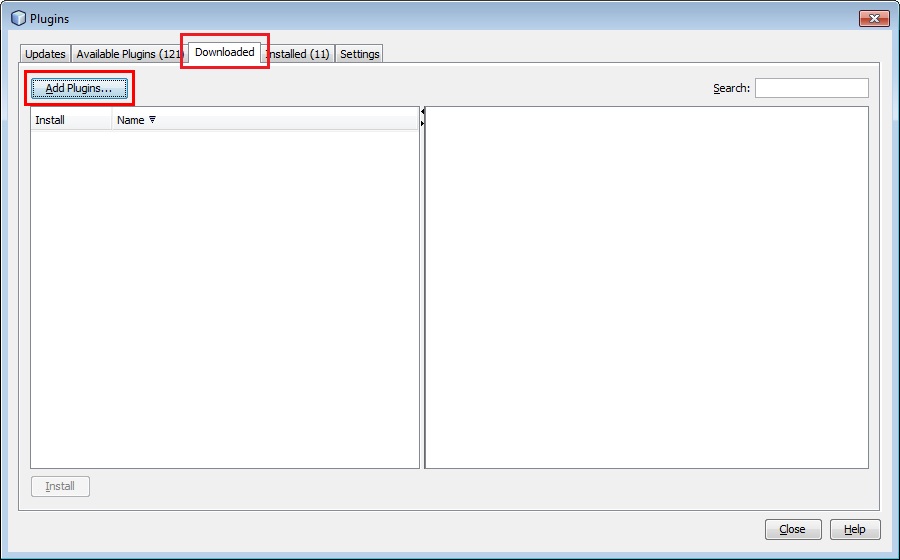
- Navigate to the directory where the uncompressed *.nbm files are located and select all of them.
- Click the Open button to add the list of plug-ins to the table on the left.

- Select all of them and click the Install button on the bottom left corner of the page.

- The NetBeans IDE Plugin Installer wizard will be open; follow the steps within this wizard.
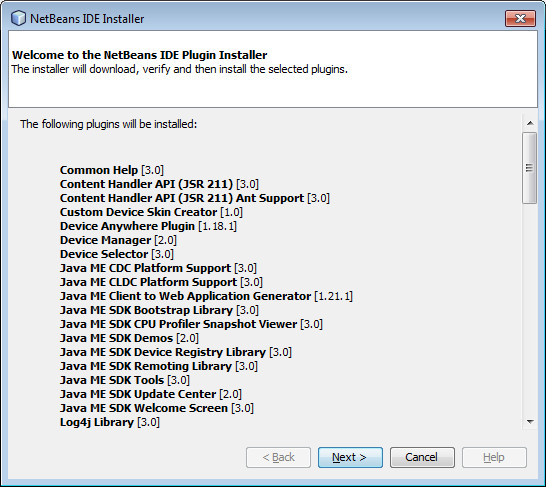
- NetBeans will automatically restart to complete the installation process.